
In order to build a reliable and long-lasting system, I try to follow these rules:
1. Fixed wires for fixed devices
If a home automation device doesn’t move around and is fixed in place, run wires to it from central controller. This method is more reliable than wireless setups and eliminates the need for batteries. This applies to both sensors and actuators.
2. No high level programming for low-level control
Do not use high level programming platforms running on general-purpose computers to control devices such as thermostats and irrigation systems. Implement core logic on the controller device itself so that it continues to operate normally even if network is not available.
3. Avoid cloud-connected devices
Make sure your home automation continues to operate normally even when Internet is not available or a manufacturer of a device goes out of business. If you do need to push data to the cloud, use an auxiliary gateway device.
4. Avoid proprietary technology
Implement everything using interoperable standards. For example, use MQTT or Modbus for communication rather than a proprietary API.
5. No loose wires
Use DIN-rail mounted components when possible. Use terminal blocks and avoid custom-built circuits. When possible, use industrial components which tend to be well documented, certified and of high quality.
6. Learn underlying principles
For any device you wish to control, understand how it works. For example, a thermostat is essentially 3-4 relays that turn on based on input from a temperature sensor. There is no magic happening in your “Smart Thermostat.”
7. Keep cost low
Determine what you need and then monitor Amazon, eBay and AliExpress for lowest price. It may take many days for a deal to pop-up, but they do eventually show up.
8. Document everything
One day when your memory starts failing and you need to modify behavior of a device, make sure you have enough documentation to be able to do so.
Example
Say you want to replace your old-school thermostat with something you can control remotely:
Understand how thermostats work
This diagram explains very clearly what role a thermostat plays in controlling your HVAC system:
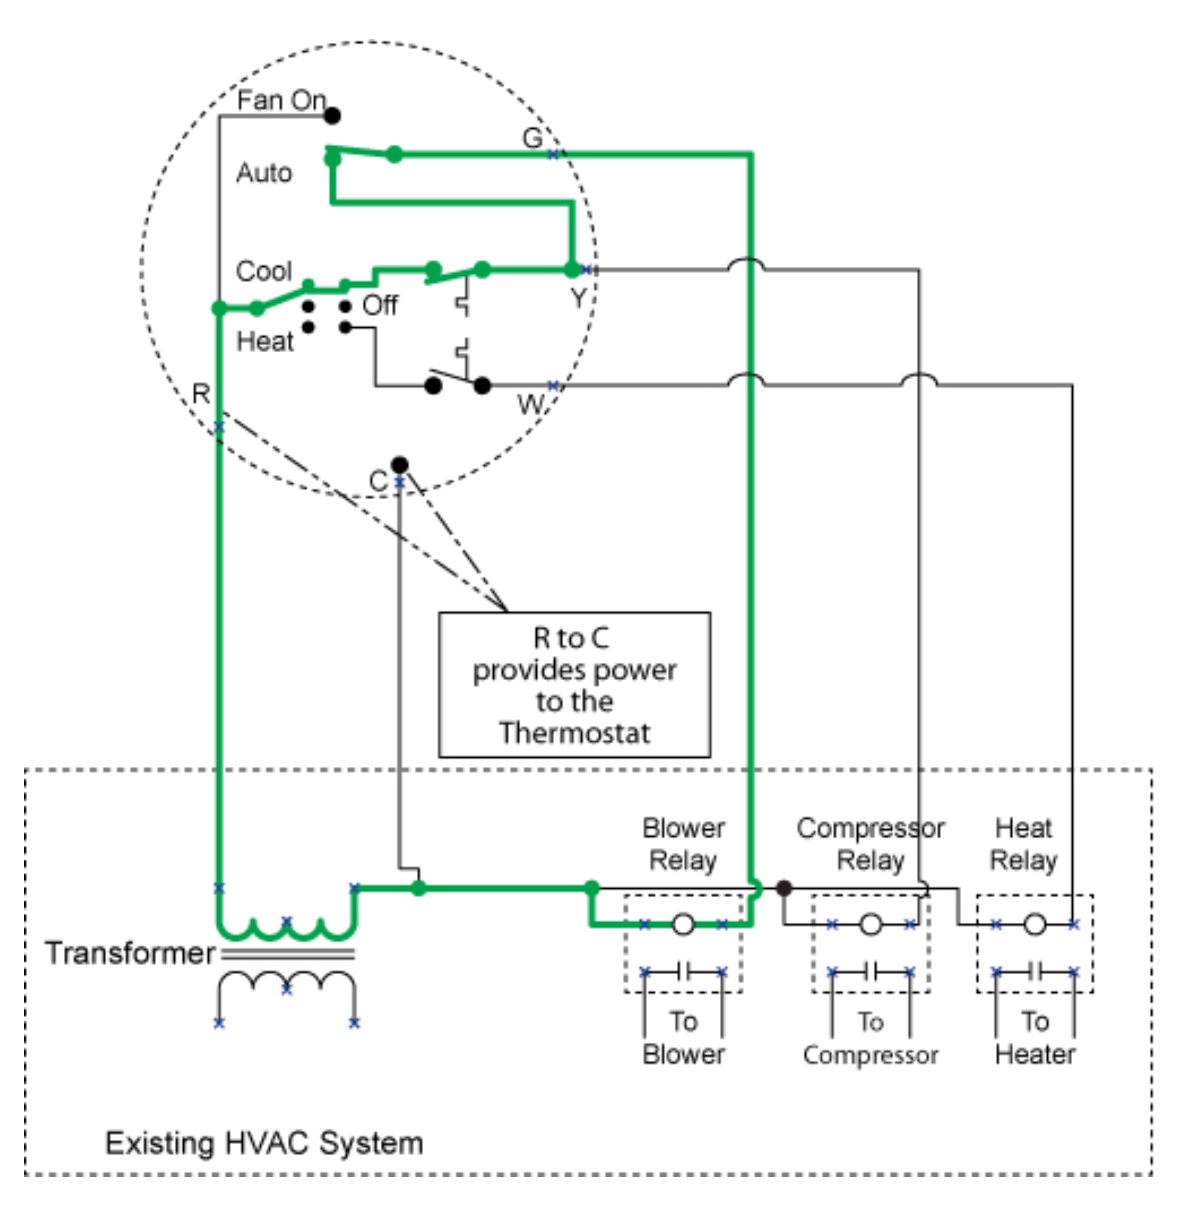
Essentially you need 3 relays which need to be turned ON or OFF based on temperature set-point. Your HVAC systems has a 24VAC transformer. You simply need to pass this signal (available on Red wire) on to Green wire for blower, Yellow for compressor and White for heater.
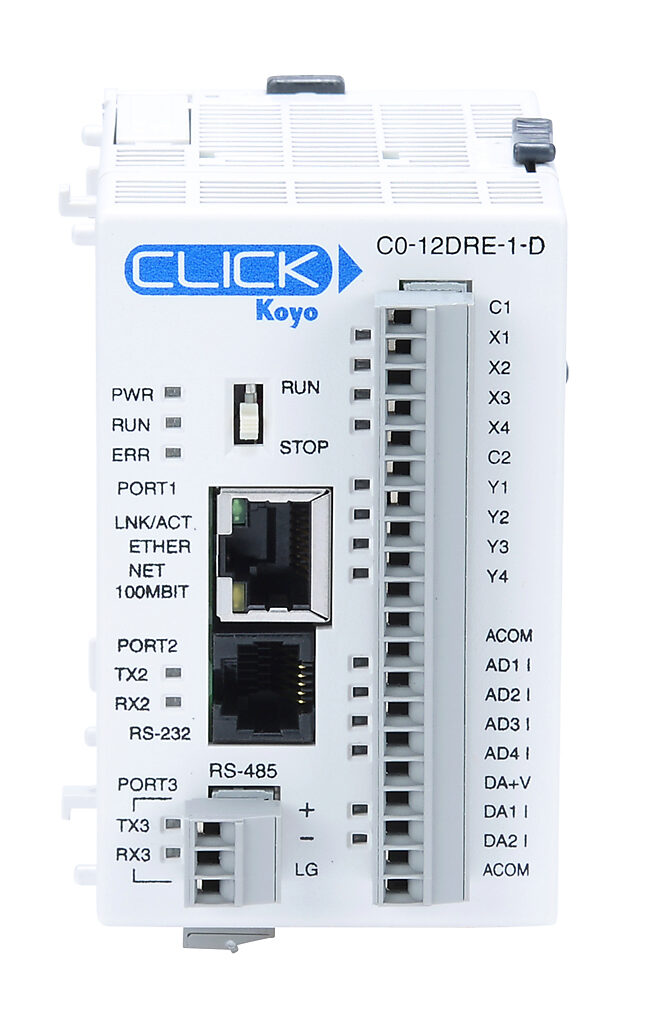
Select hardware to implement this functionality
A Siemens LOGO! or a CLICK PLC1 has all the prerequisites to implement a thermostat:
|
|
You could use any PLC really from a dozen different manufacturers, but I have invested time in learning the LOGO!, so that is what I analyze for this purpose:
| Function | |
|---|---|
| ✅ RELAYS | 4 relays available with maximum current of 10A. A thermostat typically needs to handle less than 2A |
| ✅ Analog Inputs | 0-10V analog inputs can be used to connect an industrial temperature sensor |
| ✅ Programming | LOGO! is programmed using FBD. No spaghetti code possible. |
| ✅ Network | Onboard ethernet that speaks Siemens S7 protocol or Modbus-TCP. Very convenient to interface with node-red or HomeAssistant. |
| ✅ COST | This PLC typically sells for around $160, however you are plenty of used ones available on eBay. I got mine at AliExpress for $67. |
Sure you can implement the same functionality using a ESP8266, Arduino or a Raspberry Pi. But I have written another article2 about why I would not use these devices for such purposes.
Footnotes: